


Products Management
Adding Products
1. Go to – Products > Add Products.
2. Provide a Product Name,
Brand,
Units,
Category
Sub-category
SKU: Add a unique SKU which will be used to identify the product & Print barcode in labels. Leave it empty to auto-generate it.
Barcode Type: Select a barcode type, default/recommended is C128 option. We recommend changing if only if the product added already have an SKU number for it.
Not For Selling: If a product is marked not-for-selling then it will not be displayed in POS or sales screen. This can be useful when using manufacturing module to make the ingredients as product not-for-selling also if you want to temporary disable selling for some products.
Alert Quantity: Alert quantity is used to alert when remaining stocks reaches to this level or below it.
Manage stock: Enable/Disable stock management at a product level. Product stock management is not required for services like Repairing, Hair Cutting, Web Development Printing. For items with Manage Stock Unchecked (disabled), you can sell them in unlimited quantities.
3. Business Location: Select the business location(s) where this product can sold or purchased.
4. If you use a scale to sell your products (such as vegetables/fruits), you may specify the weight of the product, you can setup the weighing system on settings.
5. Select Applicable tax for that product.
6. Select product type (single, or variable);
Single Product:
- Applicable for products with no variation with them then select single
- When selecting a Single product – You will need to enter the Default product price including/excluding tax, Profit Margin % (you can set default profit margin from settings -> Business Settings; this will help to type % every time). Based on the profit margin it will auto calculate selling price excluding of Tax. You can also enter the selling price manually and it will auto-adjust the profit margin for you.
Variable Product: - Applicable to a product having variations (like size or color or design or flavors etc) You can define variation templates from Products -> Variations. The advantage of creating variation is that it saves time to add the same variations multiple times.
- When selecting a Variable product – It will display different fields to add all variations and their related Purchase price, Selling Price. You have to select the variations from the drop-down and it will auto-populate the variations for that template. You can change the variable name, Variation values.
- Read more about Variations at the bottom of this page.

7. Specify pricing for the product, and chose featuring image.
8. Click Save.
You can edit a product. You can also Copy / Export to CSV, PDF or Excel file.
Adding Products with multiple variations:
If you have products which involve multiple variations like for example a Shirt can have Color & Size variation, then we have multiple ways to work with it:
Solution 1, Create combined variation: Can a variation with a name “Color-Size” and add values like Red-Small, Red-Medium, Red-Large, etc, this can be used for while adding the Shirt.
Solution 2, Create multiple Products: Create multiple different products like Shirt-Red, Shirt-Green, Shirt-Blue with size as variations. When you create multiple products you will NOT have to enter the same details multiple times, first, add the Shirt-Red with all size variations of it and then use the Duplicate Product action to copy the data.
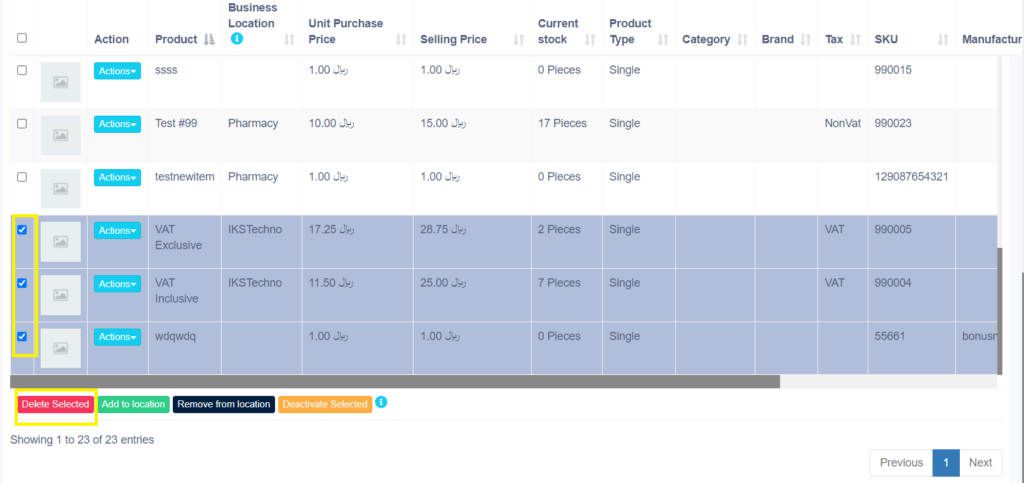
Assigning/remove location of multiple products at once:
Go to List Products and refer to this following screenshot:

Import Products:
Steps:
- Go to Products -> Import Products
- Download the template file.
- Fill all the information as per the displayed columns name & instructions. Don’t remove the heading from template file.
- Import the file
Common Errors:
- Error: UNIT not found
Solution: Make sure the unit you provided in excel file is already present in the system. Go to Products -> Units, add the unit & import the file again.
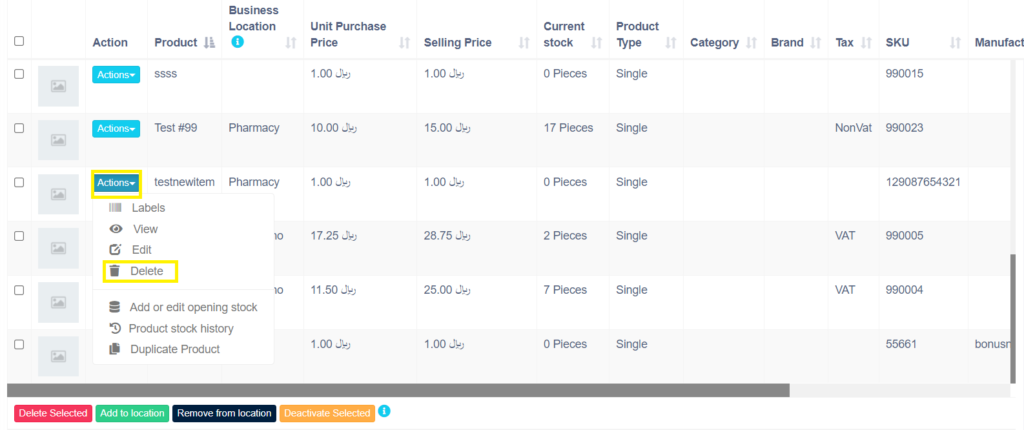
Deleting Products
Deleting of a product will remove the products from the database.
NOTE: This delete will not work if the product have some transactions related to it. Transaction can be Opening Stock, Purchase, Sales or Stock transfer of the product. It will show some error like:
- Product can’t be deleted because purchases related to this product exist
- Some products couldn’t be deleted because it has transaction related to it.
Deleting individual product
Bulk Delete Multiple Products
Product Variations:
This section will show you how to Add/Edit/Delete variations for products:
- Variations can be added from Products -> Variations menu.
- These variations are used in variable products.

